Red Discord Bot Failed To Download Requirements
[ Discord.py ] Discord Bot with fully functioning web dashboard!
Hello everyone and today I will be going through how to make a discord bot, a website dashboard and have them sync with each other!
Here are what I will be going through today!
Contents
- Introduction
- What is Discord.py?
- Flash vs Quart.
- Databases.
- Making a Discord Bot
- Creating an application.
- Coding the Discord Bot.
- Setting up the database.
- Making the web dashboard
- Creating and designing the website.
- Using routes.
- Domains.
- Outro
- Keeping the bot and the website "alive".
- More ideas to think about.
- Closing.
Introduction
What is Discord.py?
The official answer to this question is:
Discord.py is relatively simple to use providing that you actually know how to code in Python. Learning the commands just to send a simple message is extremely easy, and when you adapt your Python knowledge to Discord.py, you can create an incredibly powerful Discord bot.
Discord.py has two versions: async and rewrite. The rewrite version is the predecessor of the async version, so if you are ever searching Google for help, just remember to include rewrite in the question! 😉
Discord.py provides a gateway into the Discord API which developers can use to create Discord bots. The library is updated whenever Discord releases a new feature (for example: slash commands) and there is a Discord server where you can ask for help.
There are many versions of Discord on many languages, but Discord.py is my favourite because I can only code in Python since I'm a noob.
Flask vs Quart.
I am not sure how many people actually know of Quart.
Many people know of Flask as being this library that allows you to render html pages using Python and other alternatives include things like Django.
However, Discord.py is an asynchronous library and Flask is not. Which means that the two are incompatible. But this is where Quart comes in.
Quart is basically asynchronous Flask.
Obviously to achieve this, the two librares aren't exactly the same, but the differences are quite insignificant. I will delve more into this later.
So, to be able to create a web dashboard, we will need to use Quart instead of Flask.
Databases.
In this tutorial, we are going to create a very simple economy bot. This means that we need to be able to store people's data. However, we cannot use files on replit as they will not save. This is where databases come in.
For this tutorial, we will be using easypydb made by @Minx28 just to keep the tutorial a bit simpler. I personally would use an online database such as MongoDB :p
But now, lets start coding our Discord bot!
Making a Discord Bot
Creating an application.
SKIP THIS IF YOU ALREADY KNOW HOW TO MAKE A DISCORD.PY BOT
To create a Discord bot, first we need to create an application. And we can do so here.
To create an application, you just have to press New application in the top right hand corner.

Next, we give our application a name. In this instance, I have called it Economy Bot.

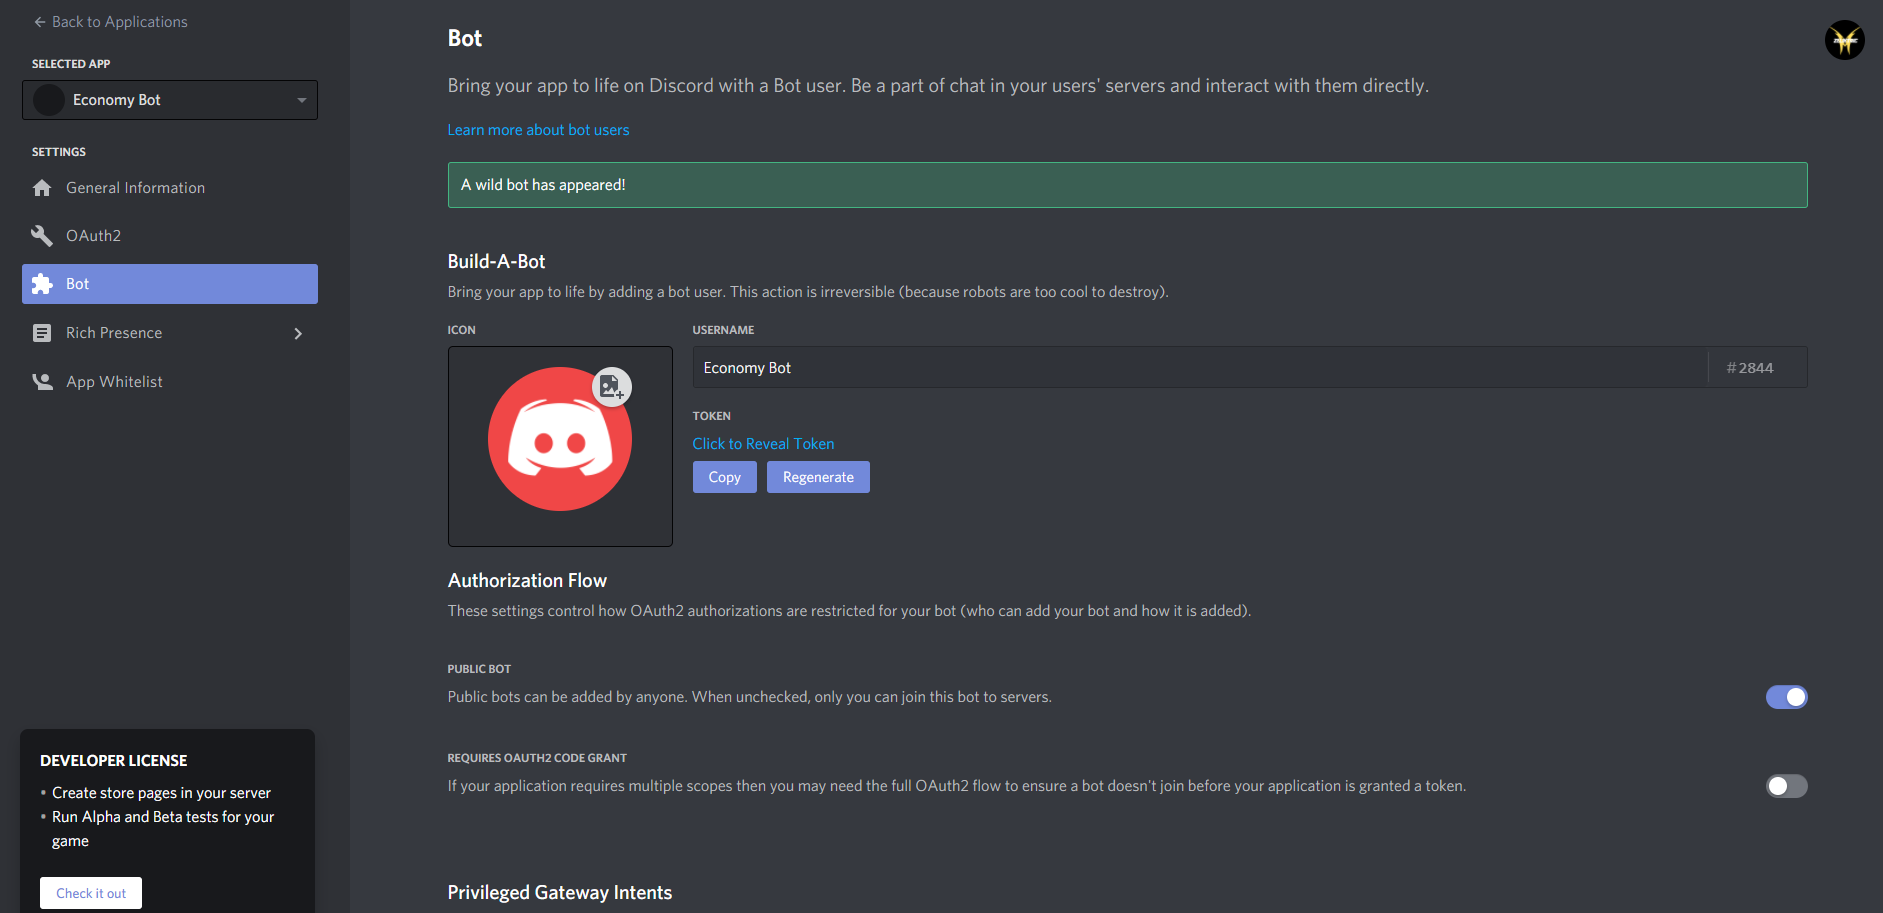
Now we want to head over to the Bot section of the application, which can be found at the left hand side.

We then press Add Bot and then Yes, do it! to create our bot.

Awesome! Now you have just created your Discord bot!
Before we start to code our Discord bot, we want to be able to test it out. So, we are going to invite it to a server.
Note: You must have manage_server in order to invite a Discord bot
Head over to the OAuth2 section, again at the left hand side.
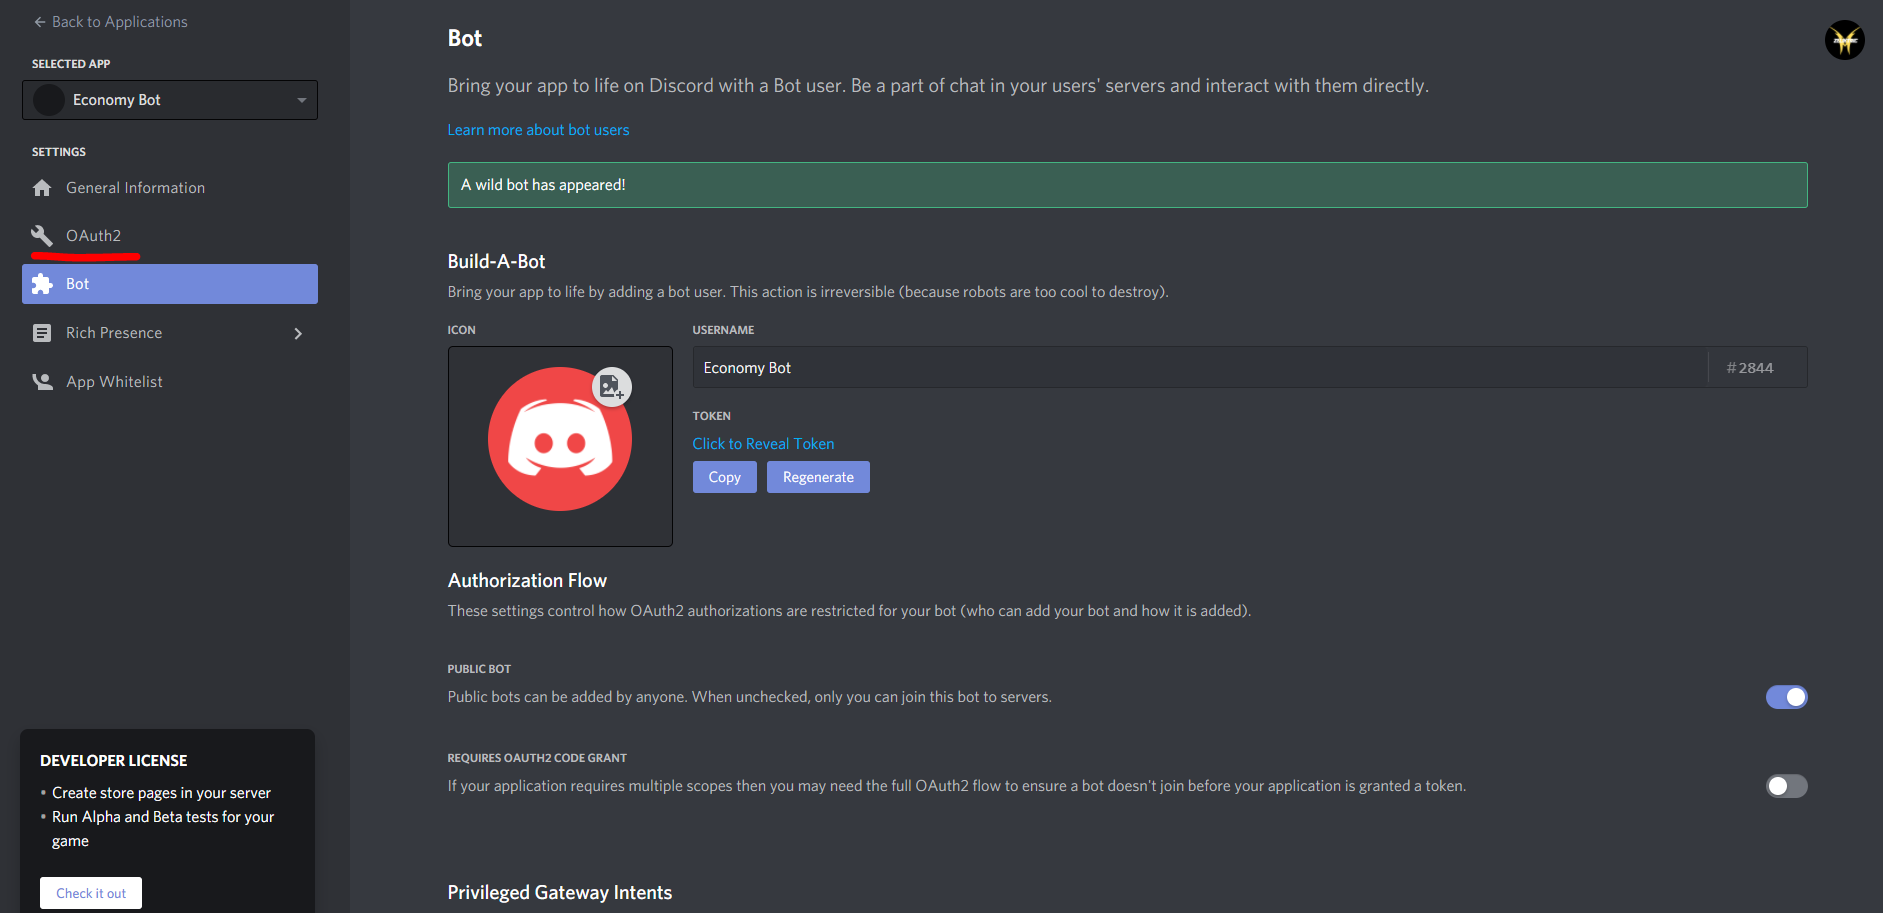
Now, in order to create a invite link, we need to press Bot.

This will now open up permissions at the bottom. For now, we aren't going to add any permissions to our bot.
Next, click Copy to copy the link, then paste it into your browser.

Add it to a server that you have the manage_server permissions for. If you don't have one, create one! 😉
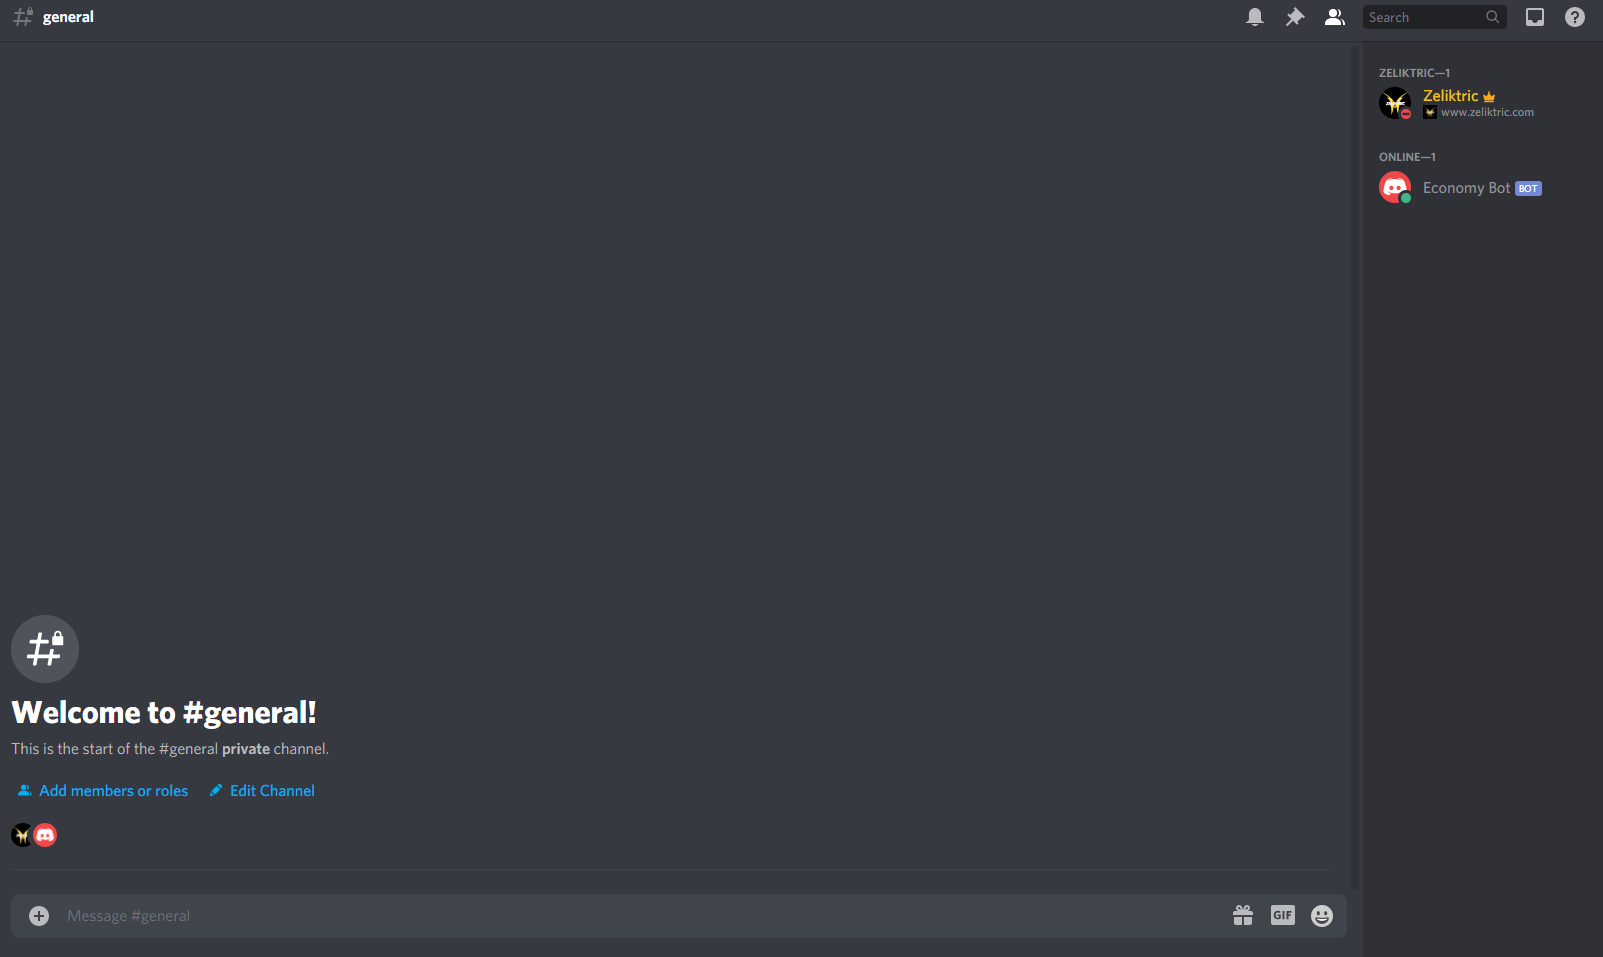
As you can see, I am adding it to a bot-testing server which I have created.

Click authorize and your bot should now be in your server!
As you can see, your bot is offline because we haven't coded anything!
So, IT'S TIME TO CODE!
Coding the Discord Bot.
By no means is this the best way to code a Discord bot.
Now don't fall into the trap that making an application and a bot means that you've somehow magically gotten yourself a bot, like I did. We actually need to code our bot and we can do this by interacting with the discord.py library!
So let's import!
These are some of the basic imports that we can have. We are using the rewrite version of Discord.py, so we are using commands.
We are going to import pretty_help to easily create help commands using cogs. More on that later. If you get an error of ModuleNotFound, simply open up the terminal and put
We can also import some essential python modules for our bot:
We are going to use asyncio so that our bot can sleep asynchronously (is asynchronously even a word xD). We import os to retrieve our token from our .env file (more on that later). Finally we import random so we can generate random numbers (also more on that later).
So your code should be looking like this now:
Now we have to define our prefix. A prefix is simply the start of a commands/sentence which tells the bot that it should respond to it. Since $ is a universally known sign for money, this is what our prefix is.
Now go back to the developer hub and get your bot's TOKEN. Simply click copy.
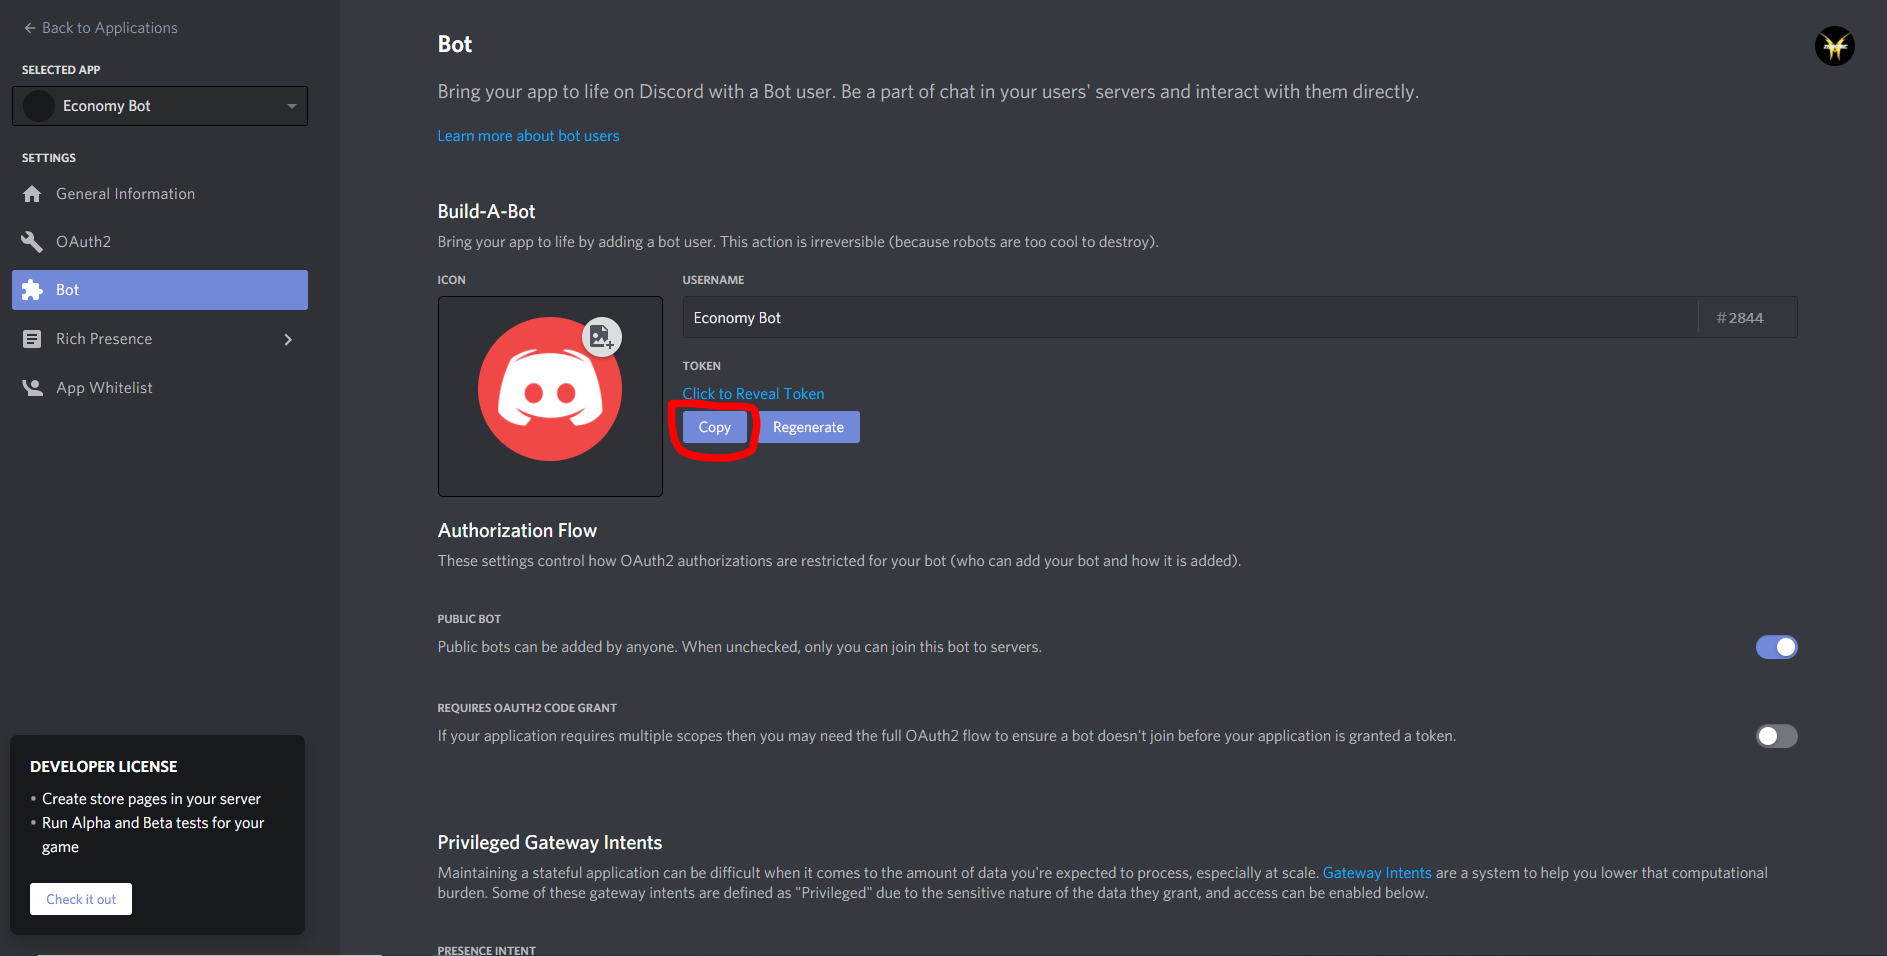
Now made a file called .env and type this:
Now go back to your main.py file and type:
We will use our token to run our bot.
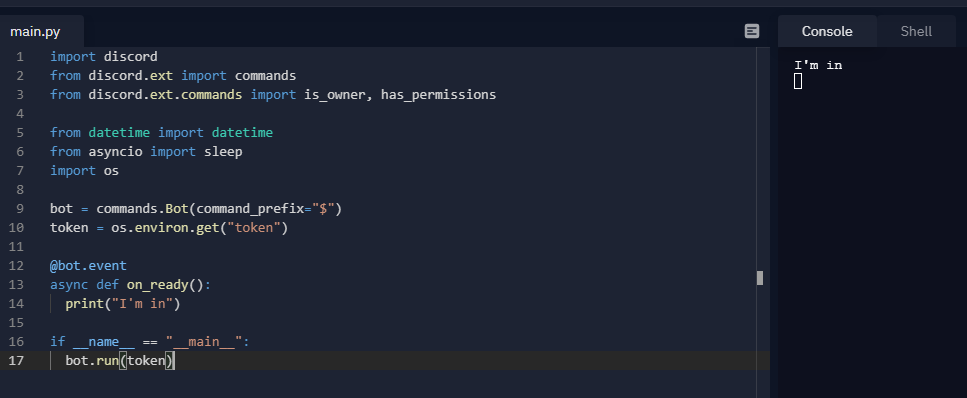
We want to know when our bot has been sucessfully connected to Discord and we can do this by using the on_ready function with the bot.event decorator:
So when you bot has successfully connected to Discord, you should see I'm in pop up in your terminal.
Now, at the end of your program, we want to run our bot and we can do this by the following:
This will run our code after importing all the libraries that we have defined.
Once you see I'm in pop up in the console, go back to your Discord server and your bot should now be online!
This is our code so far:
Now we can create our help command using pretty_help!
Now, before the bot = commands.Bot(command_prefix="$") line, we are going to define our navigation buttons.
You can define custom emojis by doing :name:ID (a: for animated).
You can simply use an emoji website and copy and paste.
Or by its unicode.
For this tutorial, I will be using the emoji website.
Then we define our bot's help command after bot = commands.Bot(command_prefix="$") by doing:
You can properly check out all the attributes in this module here.
And here for discord colours.
Now let's create a cog! 👏
This is the definition of a cog in discord.py:
We use cogs in discord.py to organise our commands by using python classes!
Please refer to this tutorial about Python OOP (Object Orientated Programming
Now we are going to create a command inside an Economy cog: work .
So lets create a class:
We can provide a short sentence in triple quotation marks to give a bit of insight into what the category is about.
Now, let's code in the two commands:
Let's break this down.
When we have a command inside a cog, we use commands.command instead of bot.command. The three arguments that I have defined are optional. If you do not provide a name, the name of the command will delegate to the function name. brief should give a quick summary of what the command does and help should be a little bit more detailed. You will see all this come into work when we run the bot.
As you can see, I have defined the function as _work. The leading underscore tells our program that we don't want anyone to be able to access the function.
Now, let's code the command!
So we want to generate a random amount of money for the user, and we can achieve this by using the randint function of the random module. So let's do that!
This will assign a random number from 1 to 10 to the variable money.
We want to tell the user how much they received, so we will use the ctx.send function.
We use f-strings to make formatting easier (can also be achieved by doing .format()) and we also mention the user, so that they know that the bot is talking to them.
Remember, ctx.send is a coroutine, so we need to await it.
Before we move onto telling the user their balance, we should test what we already have.
We need to load our new cog, and this can be done by doing bot.add_cog in our run function.
Boom! That's it! Now let's Run our program and test it out!

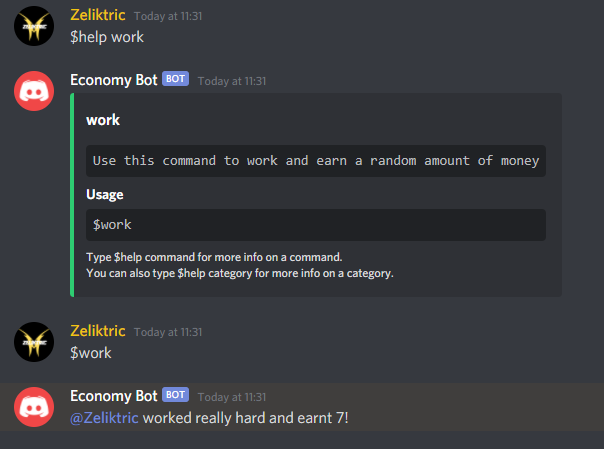
POG! We earnt 7 xD. One cool feature of pretty_help is that after a certain amount of time, it removes the reactions of the message. The default is 30 seconds, but can be overridden when we initialise it at the start.
Now we should create a balance command so that the user can keep track of how much money they have. But to do that we need to create a database!
Setting up the database.
There are many alternatives out there. I am using one that is one of the easiest to implement.
As I mentioned before, we will be using easypydb and to use it, we need to import it xD!
So, we add a line at the top of our code to do so!
Again, if an error comes up, simply type pip install easypydb in the terminal!
Now in order to use this database, we need to get a token, and it is super easy! We just need to go to this website which generates a token for us to use!
Once you have that token, we can add it to our .env file:
Now we get our token from the .env as before:
To initaliase the database, we simply give the name of the database along with our token:
Now we can use database as a dictionary. If you do not know how to use dictionaries, I would advice going here.
Now we can add our user to the database. So, when the program generates a random amount of money, we can simply add whatever value to what is currently in the database. We also need to include an error handler in case the person does not exist in the database. To keep things simple, we will be using the user's ID as you cannot change it. This is how we are certain of the user that is "working".
So let's code!
Simple right! But let's break down what we have just coded.
This loads the information from the database. This is key when working with the database between the bot and the website.
First we need to get the balance of the user. So that we can add money to their existing balance. However, if the user does not exist, we will be presented with an error. Therefore, this means that they don't have any existing balance, so we can set balance to 0.
Now, we can add their balance to the money that they have just earnt!
Note: A user's ID is in an integer form and our keys in dictionaries have to be string, that is why there is the str function which will turn the integers into a string.
Now we can create our balance function:
BOOM! We just get their balance from the database, and just output it to them! Incredibly easy :P!
So let's test out our new code!

WoW it works!
Now obviously, it doesn't look too good and you can use embeds to make it look nicer.
And also people can spam the command and get lots of money.
We can add the cooldown decorator:
which will limit 1 use of the command per 30 seconds per user. You can check here for more information.
Note: if a user tries to use the command again, it will produce an error in the console. In order to infrom the user, you need an on_command_error function in your code.
For your economy bot, you may want to make the random amount of money greater than 10. So simply create a command that puts the information into the database and when needed, just call up the information:
Obviously you don't want anyone to use this command. So you can import the is_owner decorator from discord.ext.commands if you want it to be soley for you or has_permissions so that only people with a certain permission can use it.
One last thing: If you want your bot to be public (i.e. anybody can invite it to their server), you can make nested dictionaries in the database. This would mean that certain rules apply to a certain guild. So, if you wanted people to be able to have different amounts in different servers, you would simply do this:
And when you want to get the money, you simply do:
This also applies to anything including the minMoney and maxMoney settings.
But enough about that, lets go create our web dashboard!
Making the web dashboard
Creating and designing the website.
To make things easier, we are going to code the website in the same repl as the discord bot. Now, for whatever reasons that you don't want to do this then that is fine. All you have to do is whenever you are accessing the database, you will need to do database.load() to load the data from the database.
Now let's create and design our website.
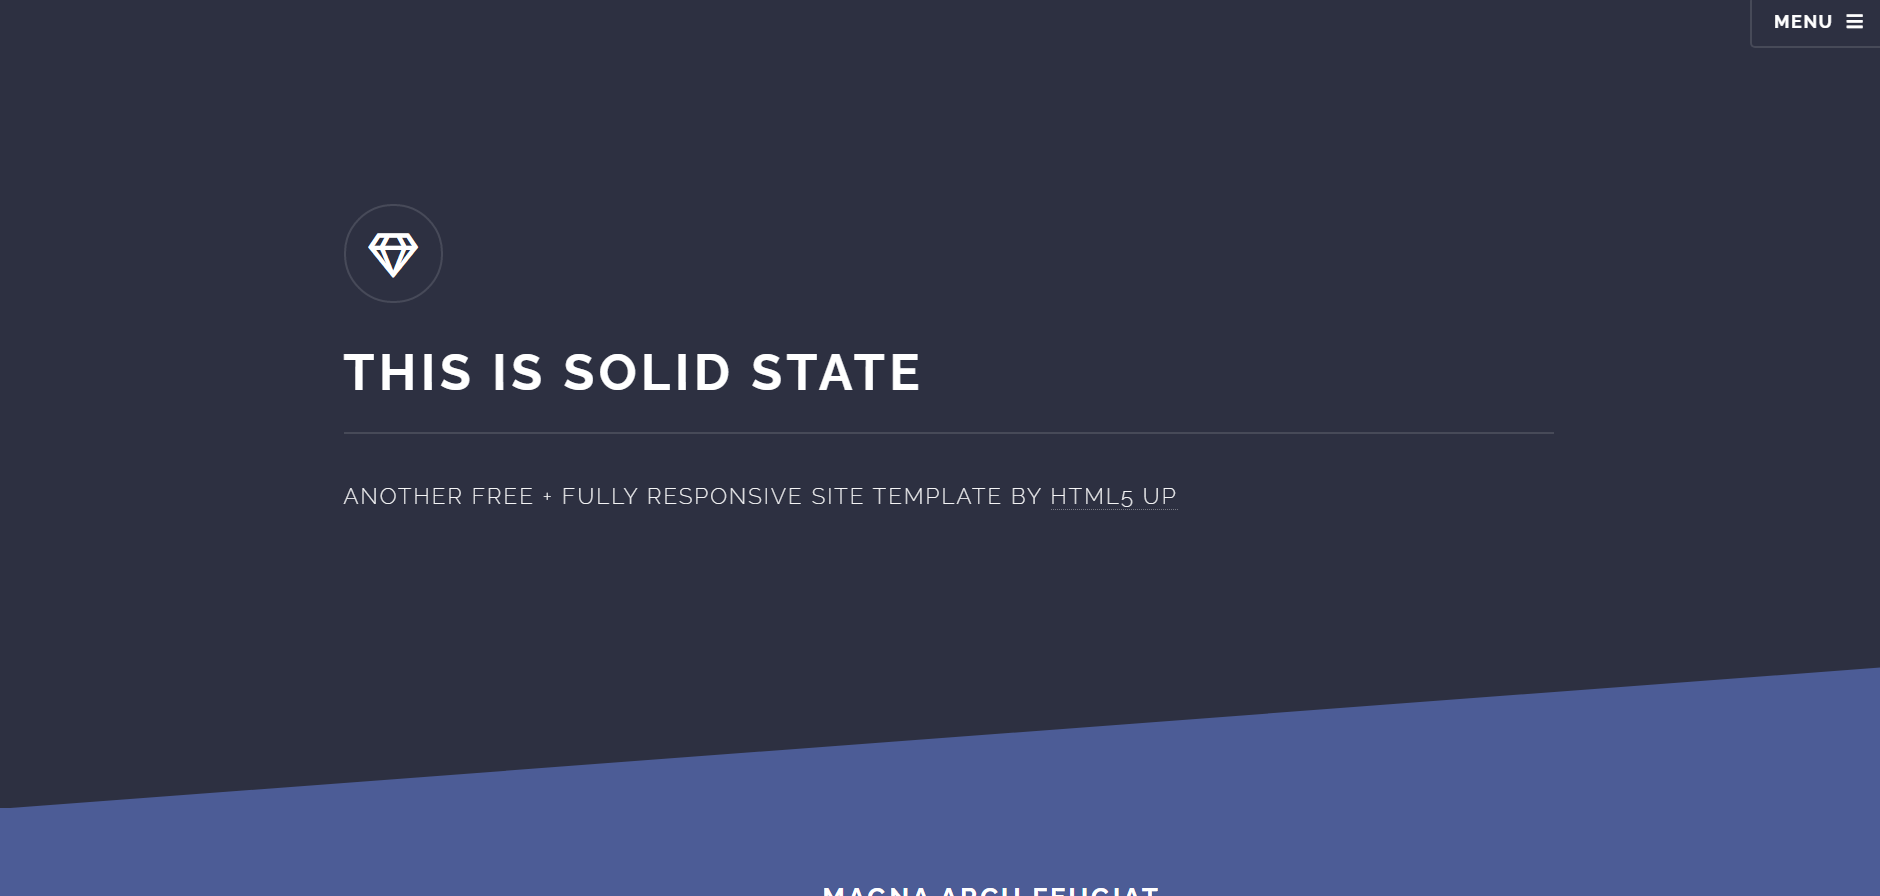
If you are fortunate enough to have a creative mind, then you can just go ahead and create your own web dashboard using HTML, CSS, JS. But if you are like me and lack a creative mind, you can go online and get a web template. For me, one of the best website templates is HTML5UP and that is where I got the design for my website!
So let's browse the site and find ourselves a cool loooking website template
A FEW MINUTES LATER (LIKE 10 I WENT TO DISCORD XD)
Okay, I'm back. I found this template and I think it would look really good for our economy bot.
So what you want to do is to download the zip, then extract all files.
Go back to your repl and create three folders: static, templates and routes. Inside routes, create utils.py
Go back to your file explorer and open up the assets folder. You should see css, js, sass and webfonts. Select all and drag into the static folder.
Go back one level and you should see some .html files. Select all and drag into the templates folder.
Now go into index.html and do CTRL + H. Type in assets in the first box, and static in the second box and click the second ICON (Replace ALL).
Now we need to do some coding in utils.py:
We are going to use Quart to render our HTML files and we need to create this utils file.
For the session, you can simply do:
or if you want to keep it secret, then generate it in the console and put it in your .env file:
Then in main.py we can add:
This imports what we need from the utils file, and imports Quart and other common necessities. We then create a route "/" which means this is the "home" page.
Then we add: bot.loop.create_task(app.run_task('0.0.0.0')) to our run function at the bottom of the program. Now, when you press Run, a little window should pop up to your right and it should say "I'm alive".

Now, we want to render our HTML template, so we go back to routes.py and change return "I'm alive" to return await render_template("index.html").
Then we can Run the program and see our HTML come to life! Remember to click the refresh button to see it in the little window, or open the URL in a new tab.
The CSS may have not loaded and to fix this, go to index.html and replace:
with
and add:
to your head (not your head, inside the head tag xD). This will make your site https and also imports the fontawesome logos that is used in the template.
If your CSS still isn't loading, refresh the page by doing CTRL + SHIFT + R.
It should now load.
Now, if you have got a web template, you can now edit and customise it in anyway!
If you would like to use my web template, then head down to the end of the post where I have posted a template!
Now once you are happy with your template, we need to install quart-discord so that we can interact with the user on the site.
If the program cannot find it, simply do pip install quart-discord.
Now we need to go back to the Discord Developers section and get some data!
You should still be at the OAuth2 section, if not, it can be located at the left hand side.
Now we need to create a redirect uri. If you are using the pre-made repl url, just copy and paste that and add /callback to the end of it. If you are using a custom domain, put that in and add /callback to the end of it.

Go back to your .env file and enter it in:
Next, go to the General Information page:

Copy your client ID:

Go to your .env file and put:
Then copy your client secret:

Go to your .env file and put:
Now we can configure our quart-discord:
Now, we initialise quart-discord by doing the following:
Note: I have named the variable discordd so the discord module does not get mixed up with it
Now let's start using routes to create the dashboard!
Using routes.
We want the user to be able to log into the website via Discord, and that is the purpose of quart-discord. However, we would want to show them something different if they aren't logged into Discord on our website. This is where we use jinja2 formatting.
First we will tweak our home route:
We are now going to add a line which tells our program if the user has logged in or not:
When we pass this to our html template, we can make it so if the user is not logged in, then a button will pop up that they should log in. Otherwise, the dashboard will be shown to them. So let's now code this into our HTML template.
So, Jinja2 uses curly brackets {} and percentages % in HTML templates.
So let's start!
Go to your index.html and for me, the dashboard is going to be in section, id="four".
Basically some HTML for feature cards - pretty neat.
So I am going to add the code that will tell jinja2 what to show:
As you can see here, jinja2 has end statements which you need to put in.
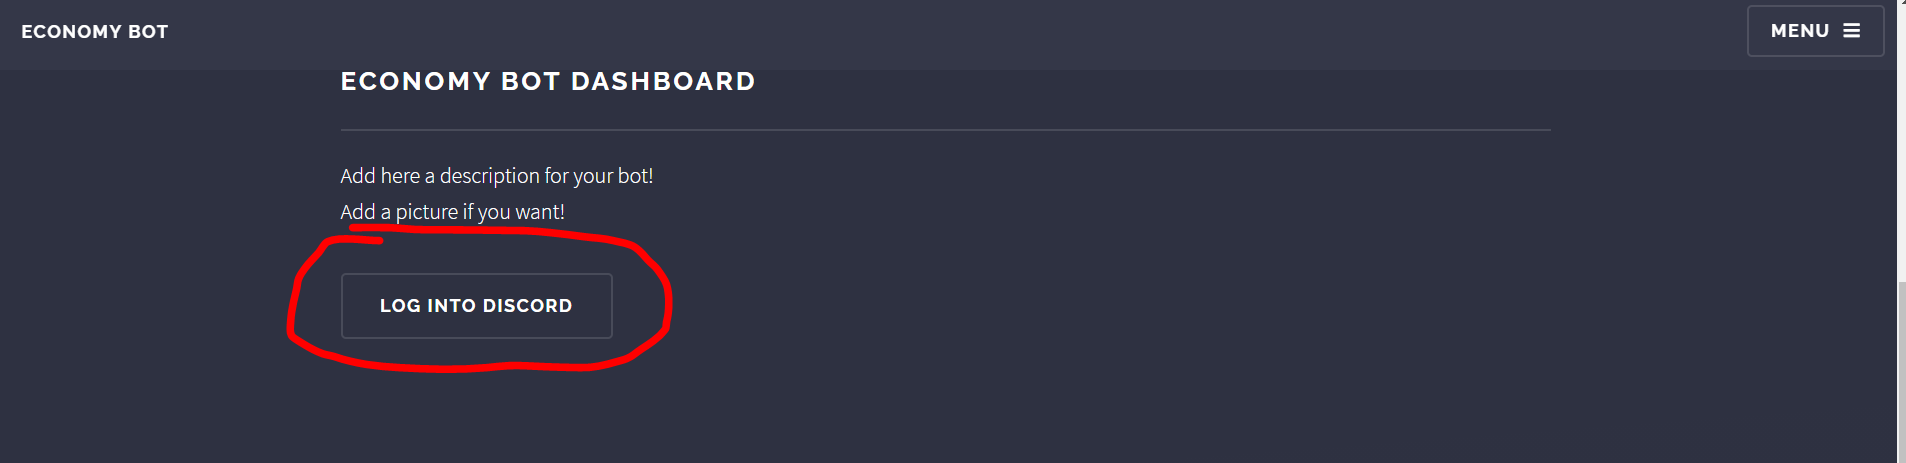
If you have got a web template, then you can add a button for the else statement, otherwise, create one.
For the href, we are putting a route so when the user clicks the button, we can code exactly what happens in the background. So, lets do that!
Go back to your main.py and we will create a new route called login:
We will create a session using quart-discord. We only need to know who is accessing our website hence the indentify scope, but you can add more if you need to.
While we are at it, we will also create a login route:
This will log our the user and then redirect them to the home page.
Similarly, when the user has finished authenticating, we need to redirect them to back to the home page:
This makes sure that the user is authorised before their details are fetched. Then it redirects to the home - just makes everything a bit more professional xD!
We also need to define the callback route... remember? xD
You may be wondering, where did bot.url come from? Well, if you wanted to access a part of the website that needed authenticating, wouldn't you be annoyed if after you did that, the website took you all the way back to the home screen? Yeah, you probably would be. So we can create an error_handler and remember where the user wanted to go in the first place. Then, when they have authenticated, we can redirect them to the webpage that they wanted to go to! Neat, right?
Now when you go to your website (after pressing Run lmao), and try to login, it should hopefully work! Now you can ahve a bit of fun logging in and out xD!
Now we want to let the user know how much money they have without going to Discord. So, we are going to add more code to our "home" route:
This will load in the database, get the balance of the user if it exists (initialises their account if not) and then pass the value to the html template.
Now, let's add some HTML to show the user's balance:
Now, if the user is logged in, their balance will be shown! Neat right?
So let's check if it works. First, let's go to Discord and find out how much we have.

Alright, we have 13 cash. Now, let's go to the website and login.
Let's authorise our application to access data about us.

And boom! If we scroll down to the "dashboard" section, our balance should show up!

Awesome! Now, we can go back to Discord and work. Then, if we refresh the page, it should show our new total!

13 + 4 is 17, the moment of truth...
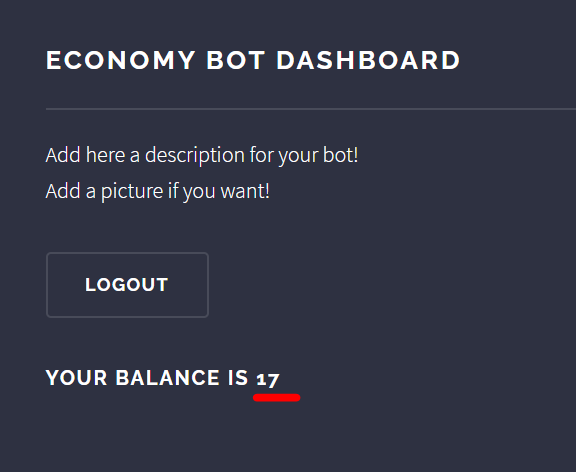
YAY! It works!
Domains
As you probably know, the url that repl gives you isn't exactly the most exciting thing in the world. And, to be more professional, it would be better to have your own domain name to show off your new bot and website.
No "good" domain names are FREE. Yes, you could go to freenom and get a free .tf or .ga etc domains, but most people know that those are free and doesn't look authentic as something like .com.
So, my advice would be to get a free frenom domain to test out your website. Because, the last thing that you want is to buy a domain and then abandon your project since you cannot edit the domain name once you have bought it.
There are many popular domain sites out there, but I recommend using Google domains.
1) Because it's Google. Google is a famous and respected organisation.
2) Their prices are low. For a .com domain, I paid £10 for one year. Some domain providers may charge monthly for a domain, and one that I came across was about £3 a month, which is £36 a year. Yes, paying monthly gives you more flexibility, but paying yearly means that you don't have to worry about paying every month and in the end, it even may be cheaper! Some domain endings are more expensive than others (for example .dev), but a simple .com domain should be good! (If you are buying a domain from Google, I would recommend using CloudFlare as a 3rd party DNS provider.)
Outro
Keeping the bot and the website "alive".
This part is relatively simple. If you have the Hacker plan, then you can use the AlwaysOn feature. Otherwise, you can use Uptimerobot.
Simply create an account, create a new monitor, set it to http(s), enter your URL (either the repl.co one or a custom one), add a friendly name and an interval (5 mins is fine) and BOOM! Your website and bot should be kept alive!

I would recommend creating without an contact, otherwise you may receive many emails! xD
More ideas to think about.
Between starting this tutorial and finishing it is more than a month xD!
I had started strong, but some difficulties and other projects made me put it on hold for a while. And between then, I have learnt much more things in discord.py!
- For cogs, you should have them in a separate file and add a
setupcommand. This way you can have extensions and reload them. (Note, if you are using Quart, then there is no point in doing this (have your bot and website on different repls)). https://discordpy.readthedocs.io/en/latest/ext/commands/cogs.html - Instead of pinging the user with their balance or work message, use the
.reply()method instead. https://discordpy.readthedocs.io/en/latest/api.html?highlight=reply#discord.Message.reply - Have a command cooldown. https://discordpy.readthedocs.io/en/latest/ext/commands/api.html?highlight=cooldown#discord.ext.commands.cooldown
- Add more command (bet, lottery, moderation commands, daily commands).
- Allow a user to customise how the bot outputs stuff (using embeds perhaps :p).
Closing.
Well, that's all I have to talk about today!
This tutorial will be as a template if you want to mess around with it.
You can invite the bot if you want :p
The website is here
I hope you've enjoyed reading this tutorial and that you've learnt something new!
Please leave comments about this tutorial. I haven't really made a tutorial this long before xD
All the images used can be found in this repl.
Thanks and GG if you read it all xD
@CoolJames1610 (658 lines woah)
Source: https://replit.com/talk/learn/Discordpy-Discord-Bot-Web-Dashboard-Tutorial/131455
Posted by: lorisklyne0194159.blogspot.com

Post a Comment for "Red Discord Bot Failed To Download Requirements"